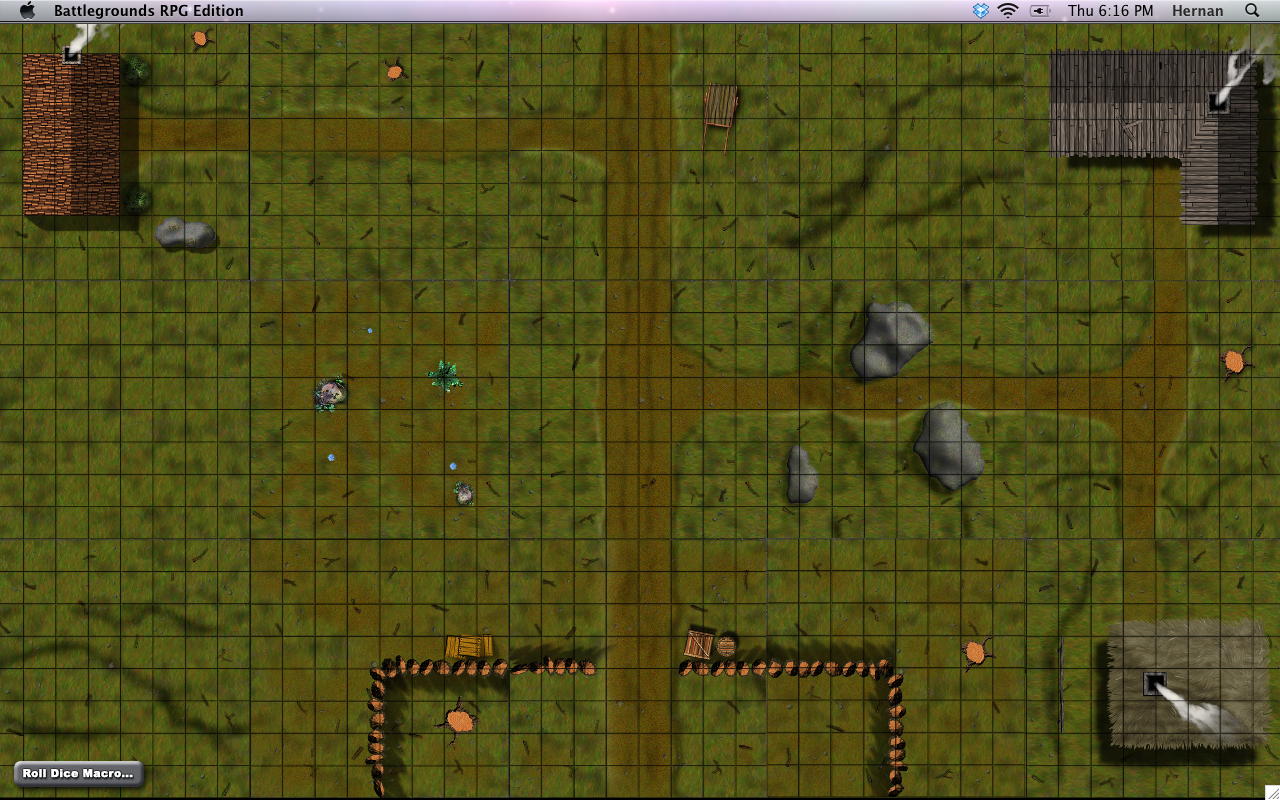
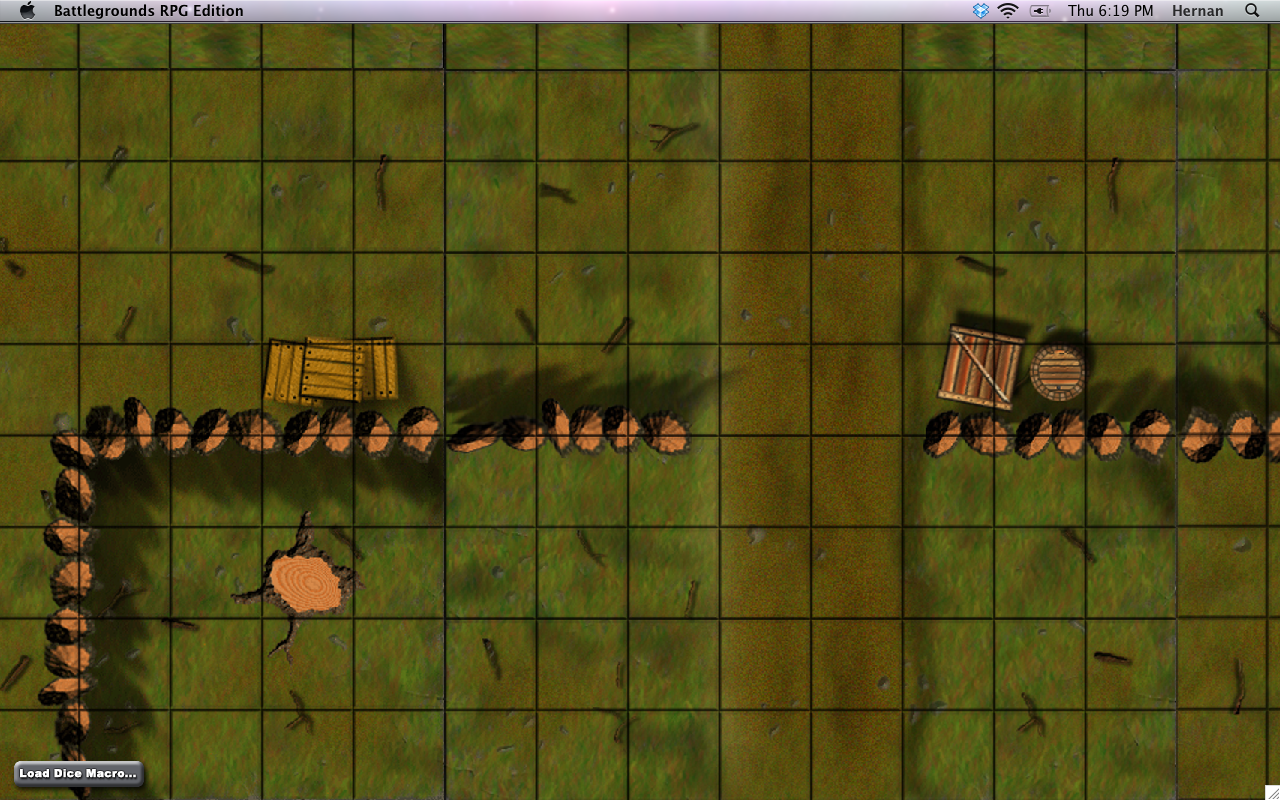
This free artpack for BRPG contains 86 unique outdoor map tiles (8×8 squares each) for creating layouts of villages, forts, castles, towers, and the general outdoors. All of the tiles are downloadable for free from www.dreamweavedworlds.com, but the tiles in this artpack have been retouched (to remove white dots from the grid overlay, and most of the copyright notices) and enlarged for use in BRPG (to 122 pixels per square, so that they won’t pixelate even at full zoom). The tiles have also been renamed and organized into easy-to-use categories, for faster mapping.
All the tiles in this artpack were created by Cyberdrake, and are being re-distributed with his permission.
This is a convenient set both for GM’s who like to improvise on-the-fly and those who like to create elaborate layouts well ahead of game-time.
You can download the artpack here:
Cyberdrake’s Outdoor Map Tiles Pack (168.7 MB)
Installation instructions and other important information are in the ReadMe file which is included in the download.
Note that players will need to have this artpack installed during sessions where the GM will use it, and everyone should be using BRPG v1.8b or higher.
Below are some pictures to give you an idea of what the tiles in this artpack look like.
Unit Palette available!
I put together this Unit Palette to add value to this BRPG artpack. It is intended to make the process of creating layouts with the artpack much faster and easier. BRPG v1.8b or higher is recommended in order to use this Unit Palette to its full potential.
Installation instructions are included in the zip file. Only the GM needs to install these files. Players do not need to download or install the Unit Palette, but they will of course need to download and install whichever artpack/s the GM plans to use in his/her game sessions.
Enjoy!
Download Link: COT Unit Palette (33.4 KB)
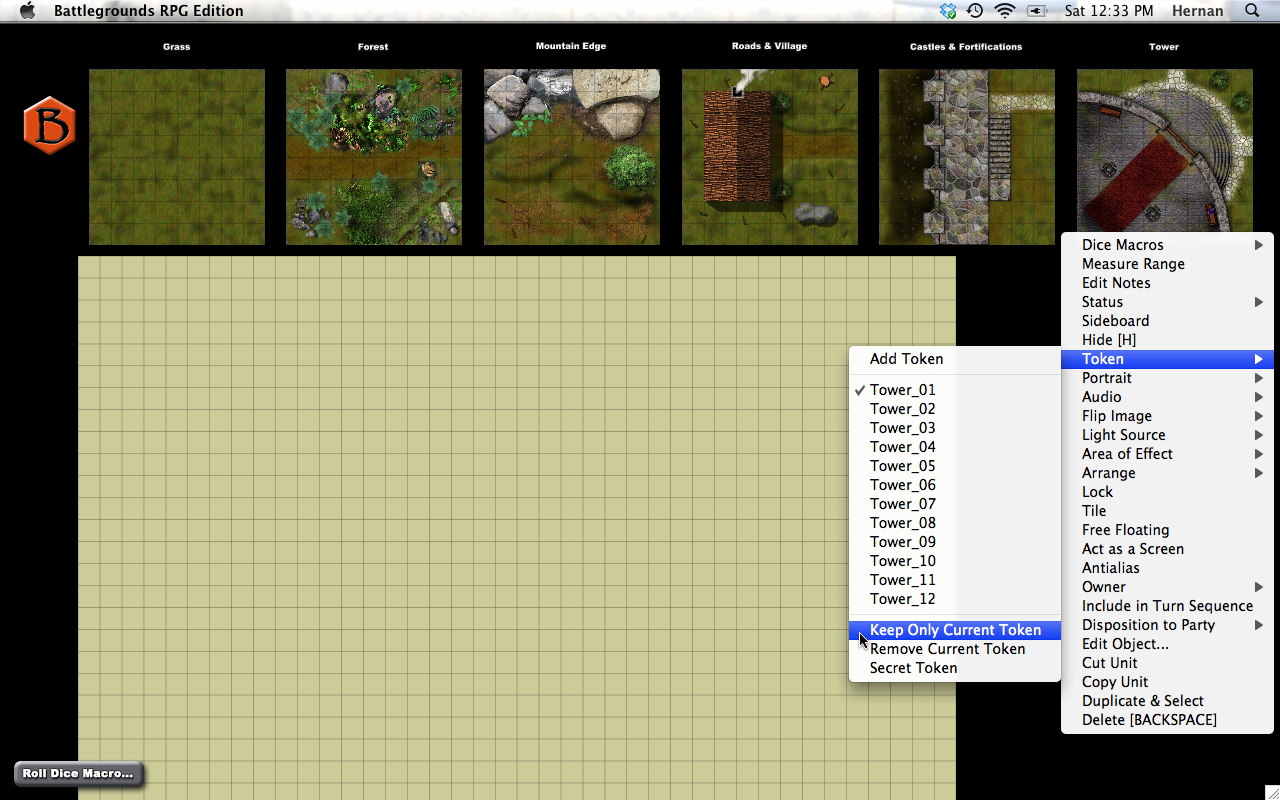
How To Use the Unit Palette
Load the included Encounter file. This will automatically load the relevant Media Asset Bundle (which contains the rendered text labels). The Encounter will present you with a blank map canvas, with the Unit Palette located just above the map. Simply copy a unit from the palette that you wish to place on the map, paste it to the desired spot on the map, and then use the token-swapping hotkeys to select the exact token you wish to use. When you are satisfied with your token selection, select the “Keep Only Current Token” command from the unit’s contextual popup menu. After fine-tuning the exact placement of the unit on the map window (and perhaps adjusting the stacking order of the unit using the Unit Manager), you will probably want to select the “Tile” command to lock the unit in place and force it to be drawn underneath the grid overlay and figure bases.
The Unit Palette also comes in Deployment format, so that you can easily import the Unit Palette into any existing Encounter to continue fleshing it out.
Regardless of whether you use the Encounter or the Deployment, when you no longer need the Unit Palette on the map window (e.g., if you are finished creating your layout), simply select the entire Unit Palette with the selection marquee and delete it from your Encounter.